Access sharing
Every administrator of an application (database) may invite new users, manage their roles and of course remove them.
Access overview
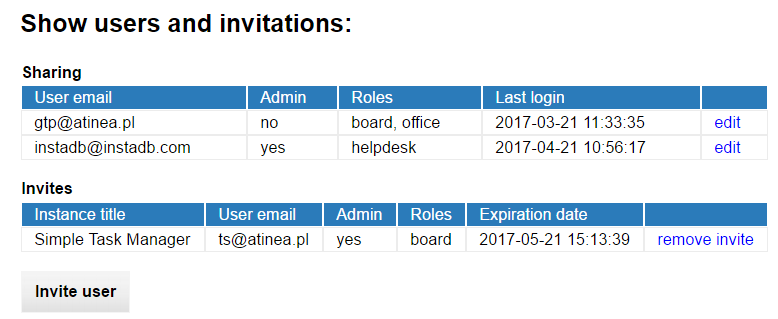
The Show users and invitations option in the application settings leads to the user management panel. It is composed of two tables:
-
Users,
-
Invitations.
Users table lists all application users, who has already accepted theirs invitations. The table indicates if a user is one of administrators, display his/her roles and the last login time. The edit link let to edit parameters of selected user. It is described in details further in this chapter.
Invitations table shows sent invitations, which are not yet accepted. Every invitation contains expiration date, after which it is no longer valid. The invitations sent from InstaDB platform are valid for seven days, but if needed, you may send another invitation to the same user. The remove invitation link can be used to remove outdated (or still valid) invitation.
Below the tables id the Invite user button, which directs to the invitation screen, described below.
Sending invitation
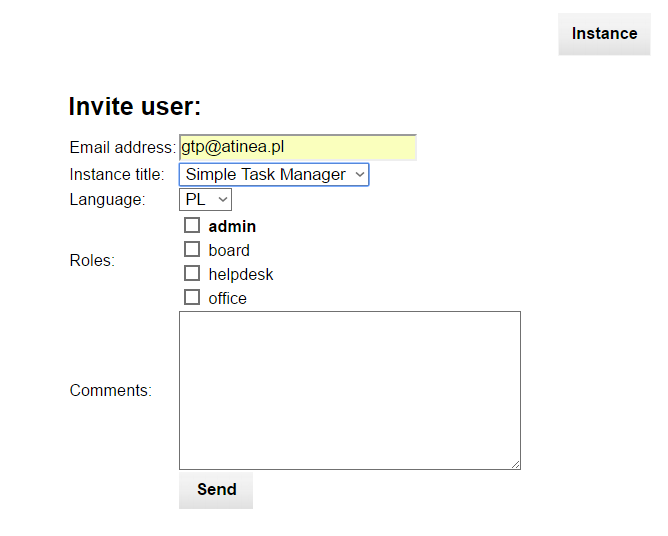
The invitation form contains several parameters:
-
Email address of the target users the only required parameter. The email will be the user login.
-
Instance title is the name under which you see an application. Usually there is only one name on the list, but it is possible to have multiple accesses to the same application, as explained further. In such case every access name will be present on the list.
-
Language in which the invitation will be send.
-
Roles, which will be assigned to the user. Note that the admin role is always present and does not depend on the roles defined in the application schema. The admin role gives a set of privileges, so it should be given with caution.
-
Comments section is optional. The text written here will be assigned to the standard InstaDB invitation message.
The invited user will shortly receive an email message with the invitation link. To accept it the user needs to click (or copy-paste) the link before the expiration date (7 days form the sending time). It will lead him/her to the form of account creation. The only parameter the user needs to provide is his/her new password (the email is the login). After filling the form user will be directed to the InstaDB Manager with the application.
If the user already has an InstaDB account, the invitation email will be sent, but of course the password creation step will be skipped. Moreover the invitation will be also visible in the InstaDB Manager (at the bottom of the page).
Multiple accesses
It is worth to know that you may sent an invitation to yourself. Such invitation(s) may have different roles selection. The main reason for this is to test roles based permission.
When you have multiple accesses to the single application, every one of them is represented by a separate position on the application list in the InstaDB Manager. Your set of roles in the application depends on the position you use to enter it. You may even use two or more accesses at the same time in. To do it, open every access in the separate browser tab or window.
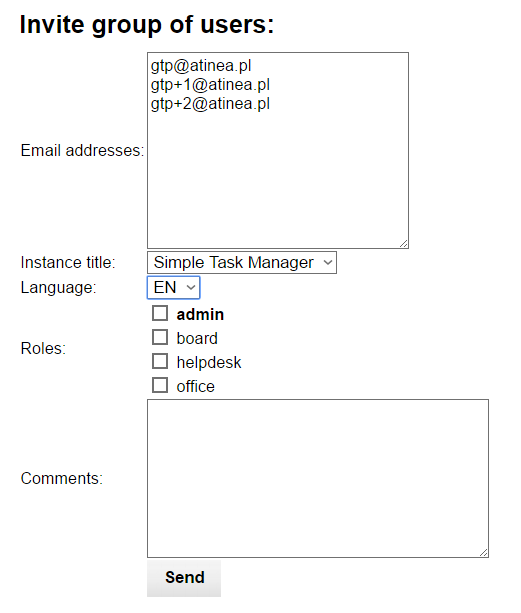
Invite group of users
It is possible to invite many user at once, using the Invite group of users link in the InstaDB Manager. TO do it, just enter the list of emails in the Email addresses field of the form. Every address must be in separate line, without any other separator characters, like coma, semicolon, spaces etc.
The group invitation have some limitations. First of all a user must already have account on the InstaDB platform to be invited. So it cannot be a tool for sending the first invitation for a user. This is because of the anti-spam control mechanism.
Another limitation is that users needs to have the same language and set of roles. So if you have a big group of users to be invited, you need to divide it by the role.
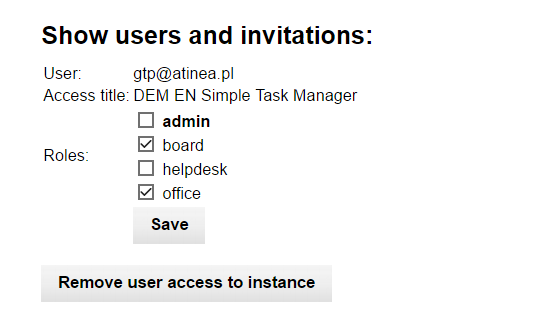
Managing user's access
The user access can be edited by clicking the edit button in the Users table described above.
On the access edit screen you may change the set of roles assigned to the user or remove his/her access completely.
Remember that the roles is technically just set of user (or access) tags. The permissions associated with the roles needs to be established in the application schema.